Gather the tools
- Digital Calipers
- Phone with a working camera
- (optional) Cutting mat or squared paper as a background.
- (optional) Selfie stick or other phone standard.
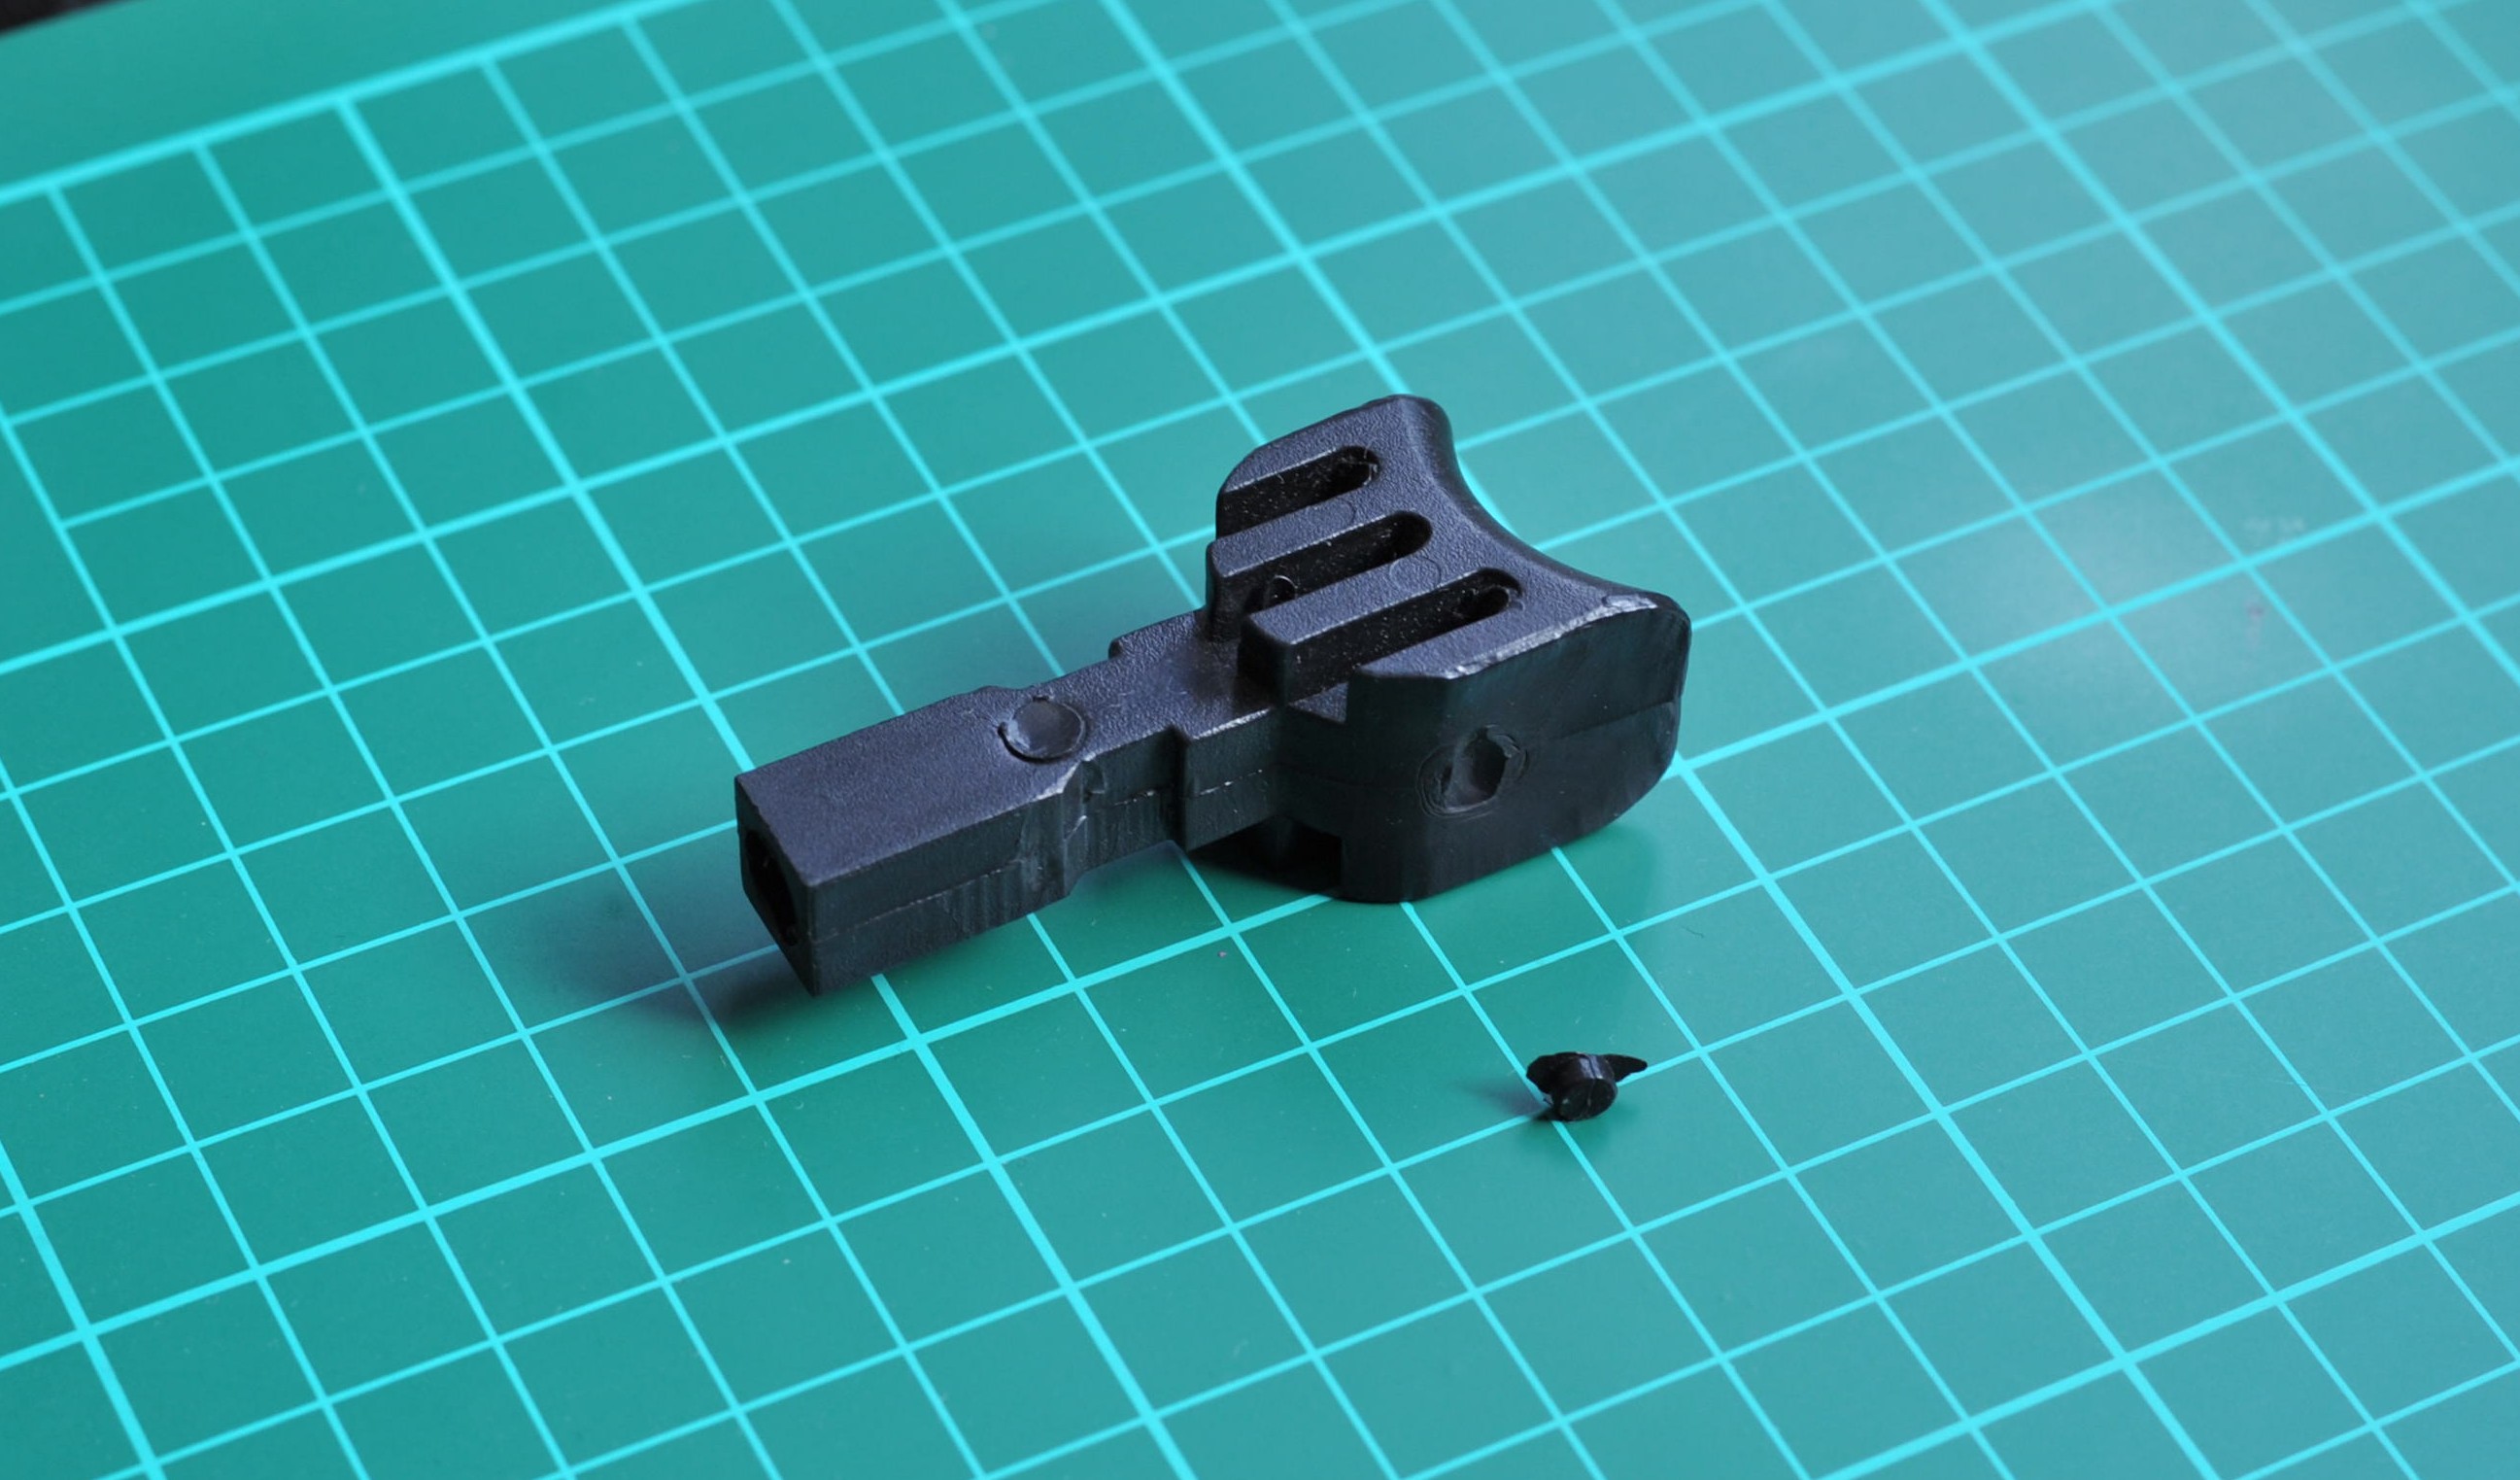
Step 1. Inspect your object
Look closely at your object and check the following:
- There is any damage to the part?
- How many measurements are needed to replicate the part?
- Are there any parts missing that need to be rebuilt?
If you can answer all these questions continue to step 2.
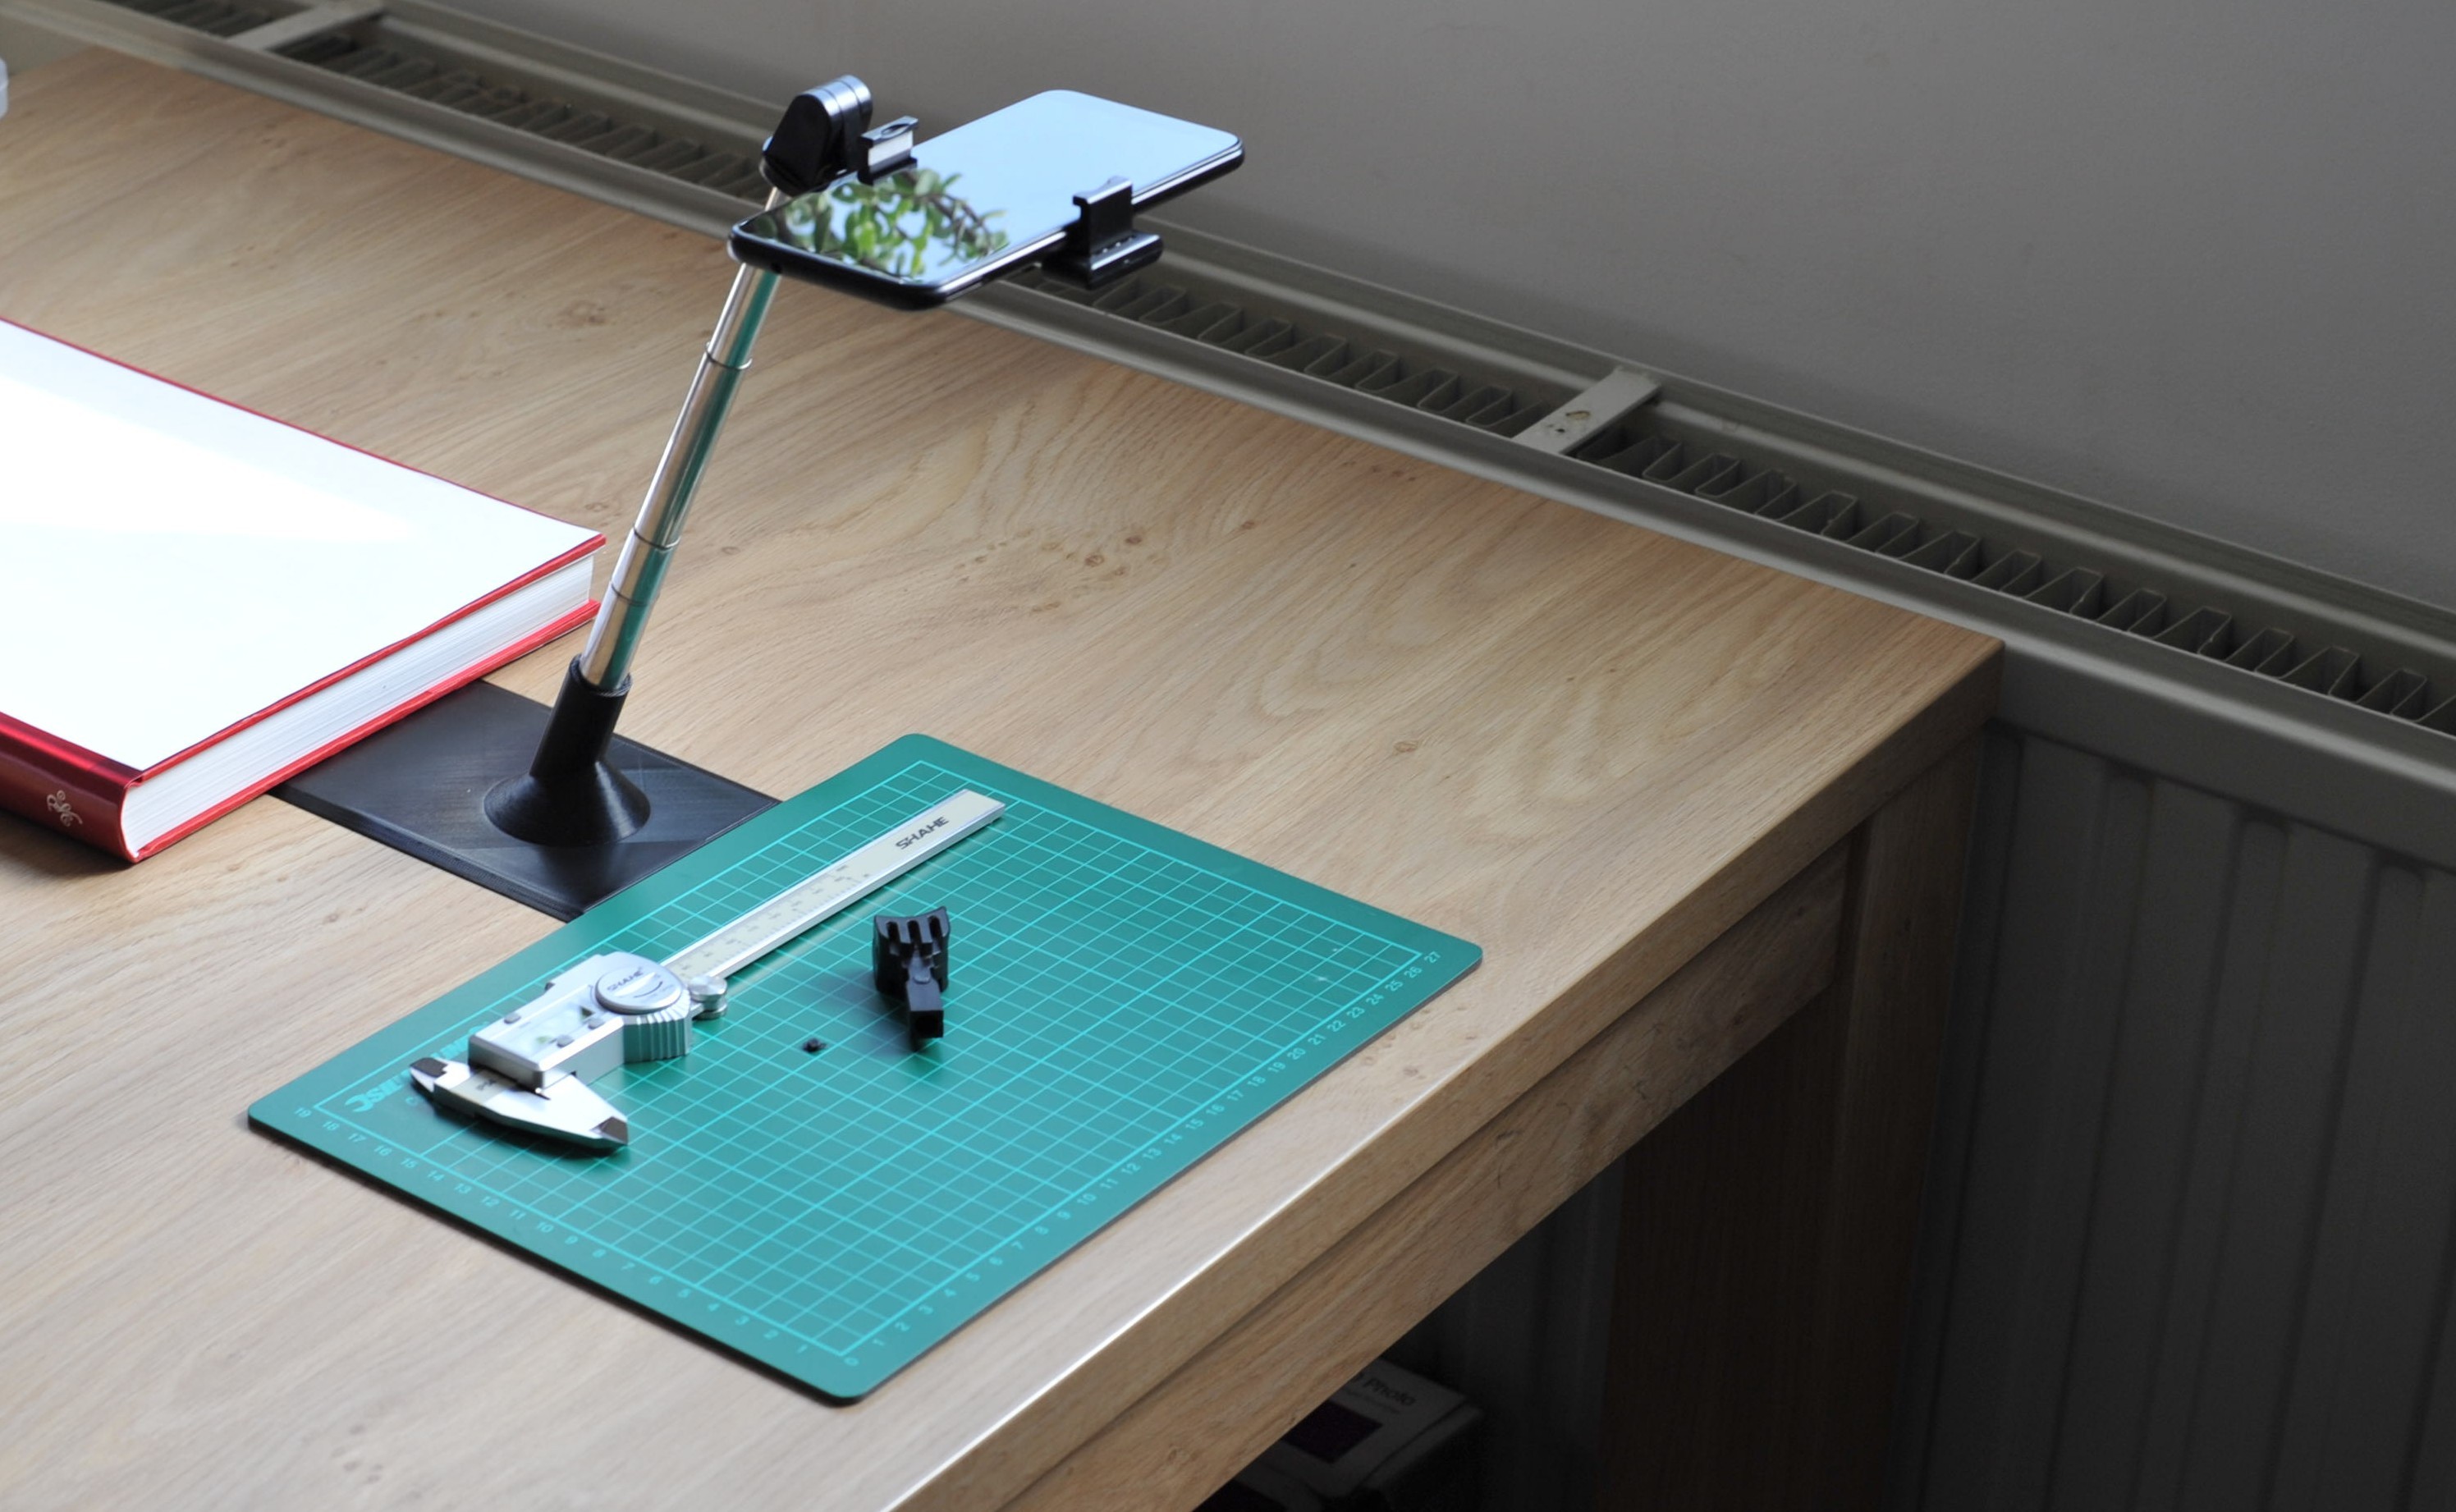
Step 2. Setup your measuring station
Make sure there is enough light, sit down next to a window or a very bright light.
Make sure your caliper is set to zero by gently keeping it shut and pressing the zero button.
Setup a phone standard, or let someone else hold your phone if possible. Or you can rock it in one hand.
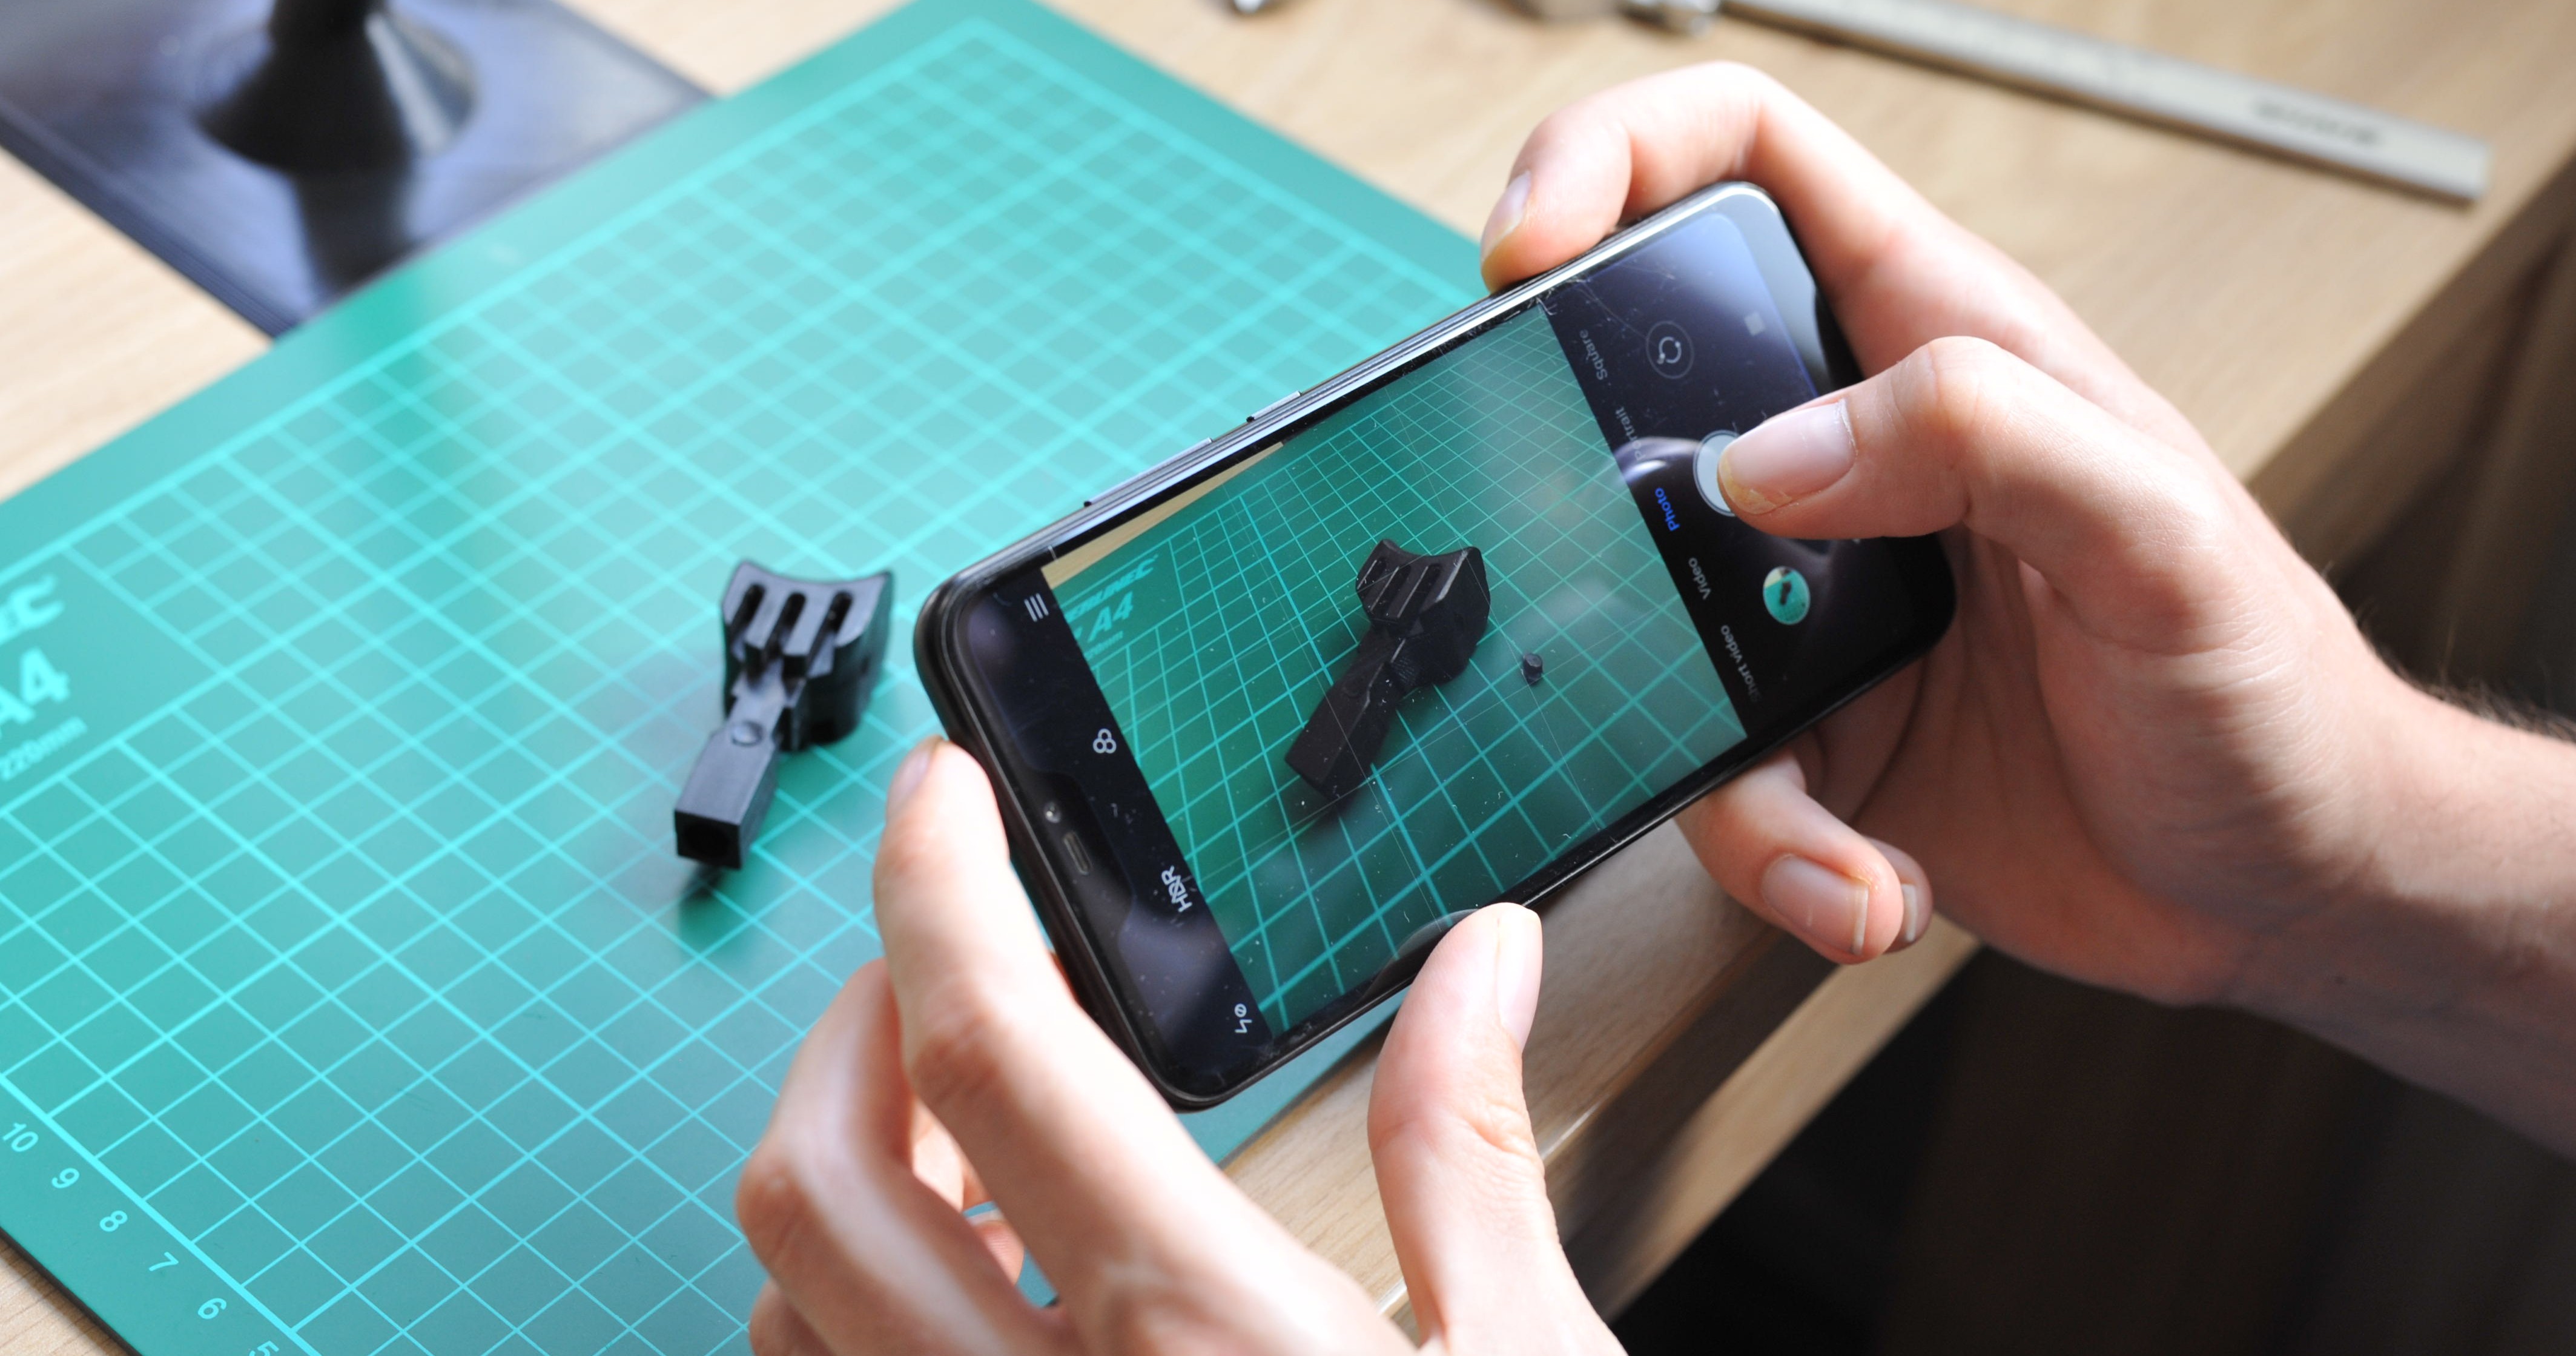
Step 3. Take some overview pictures
Make sure to capture the whole object in a 3D-view from several angles so that the maker gets a better idea of the geometry of the object.
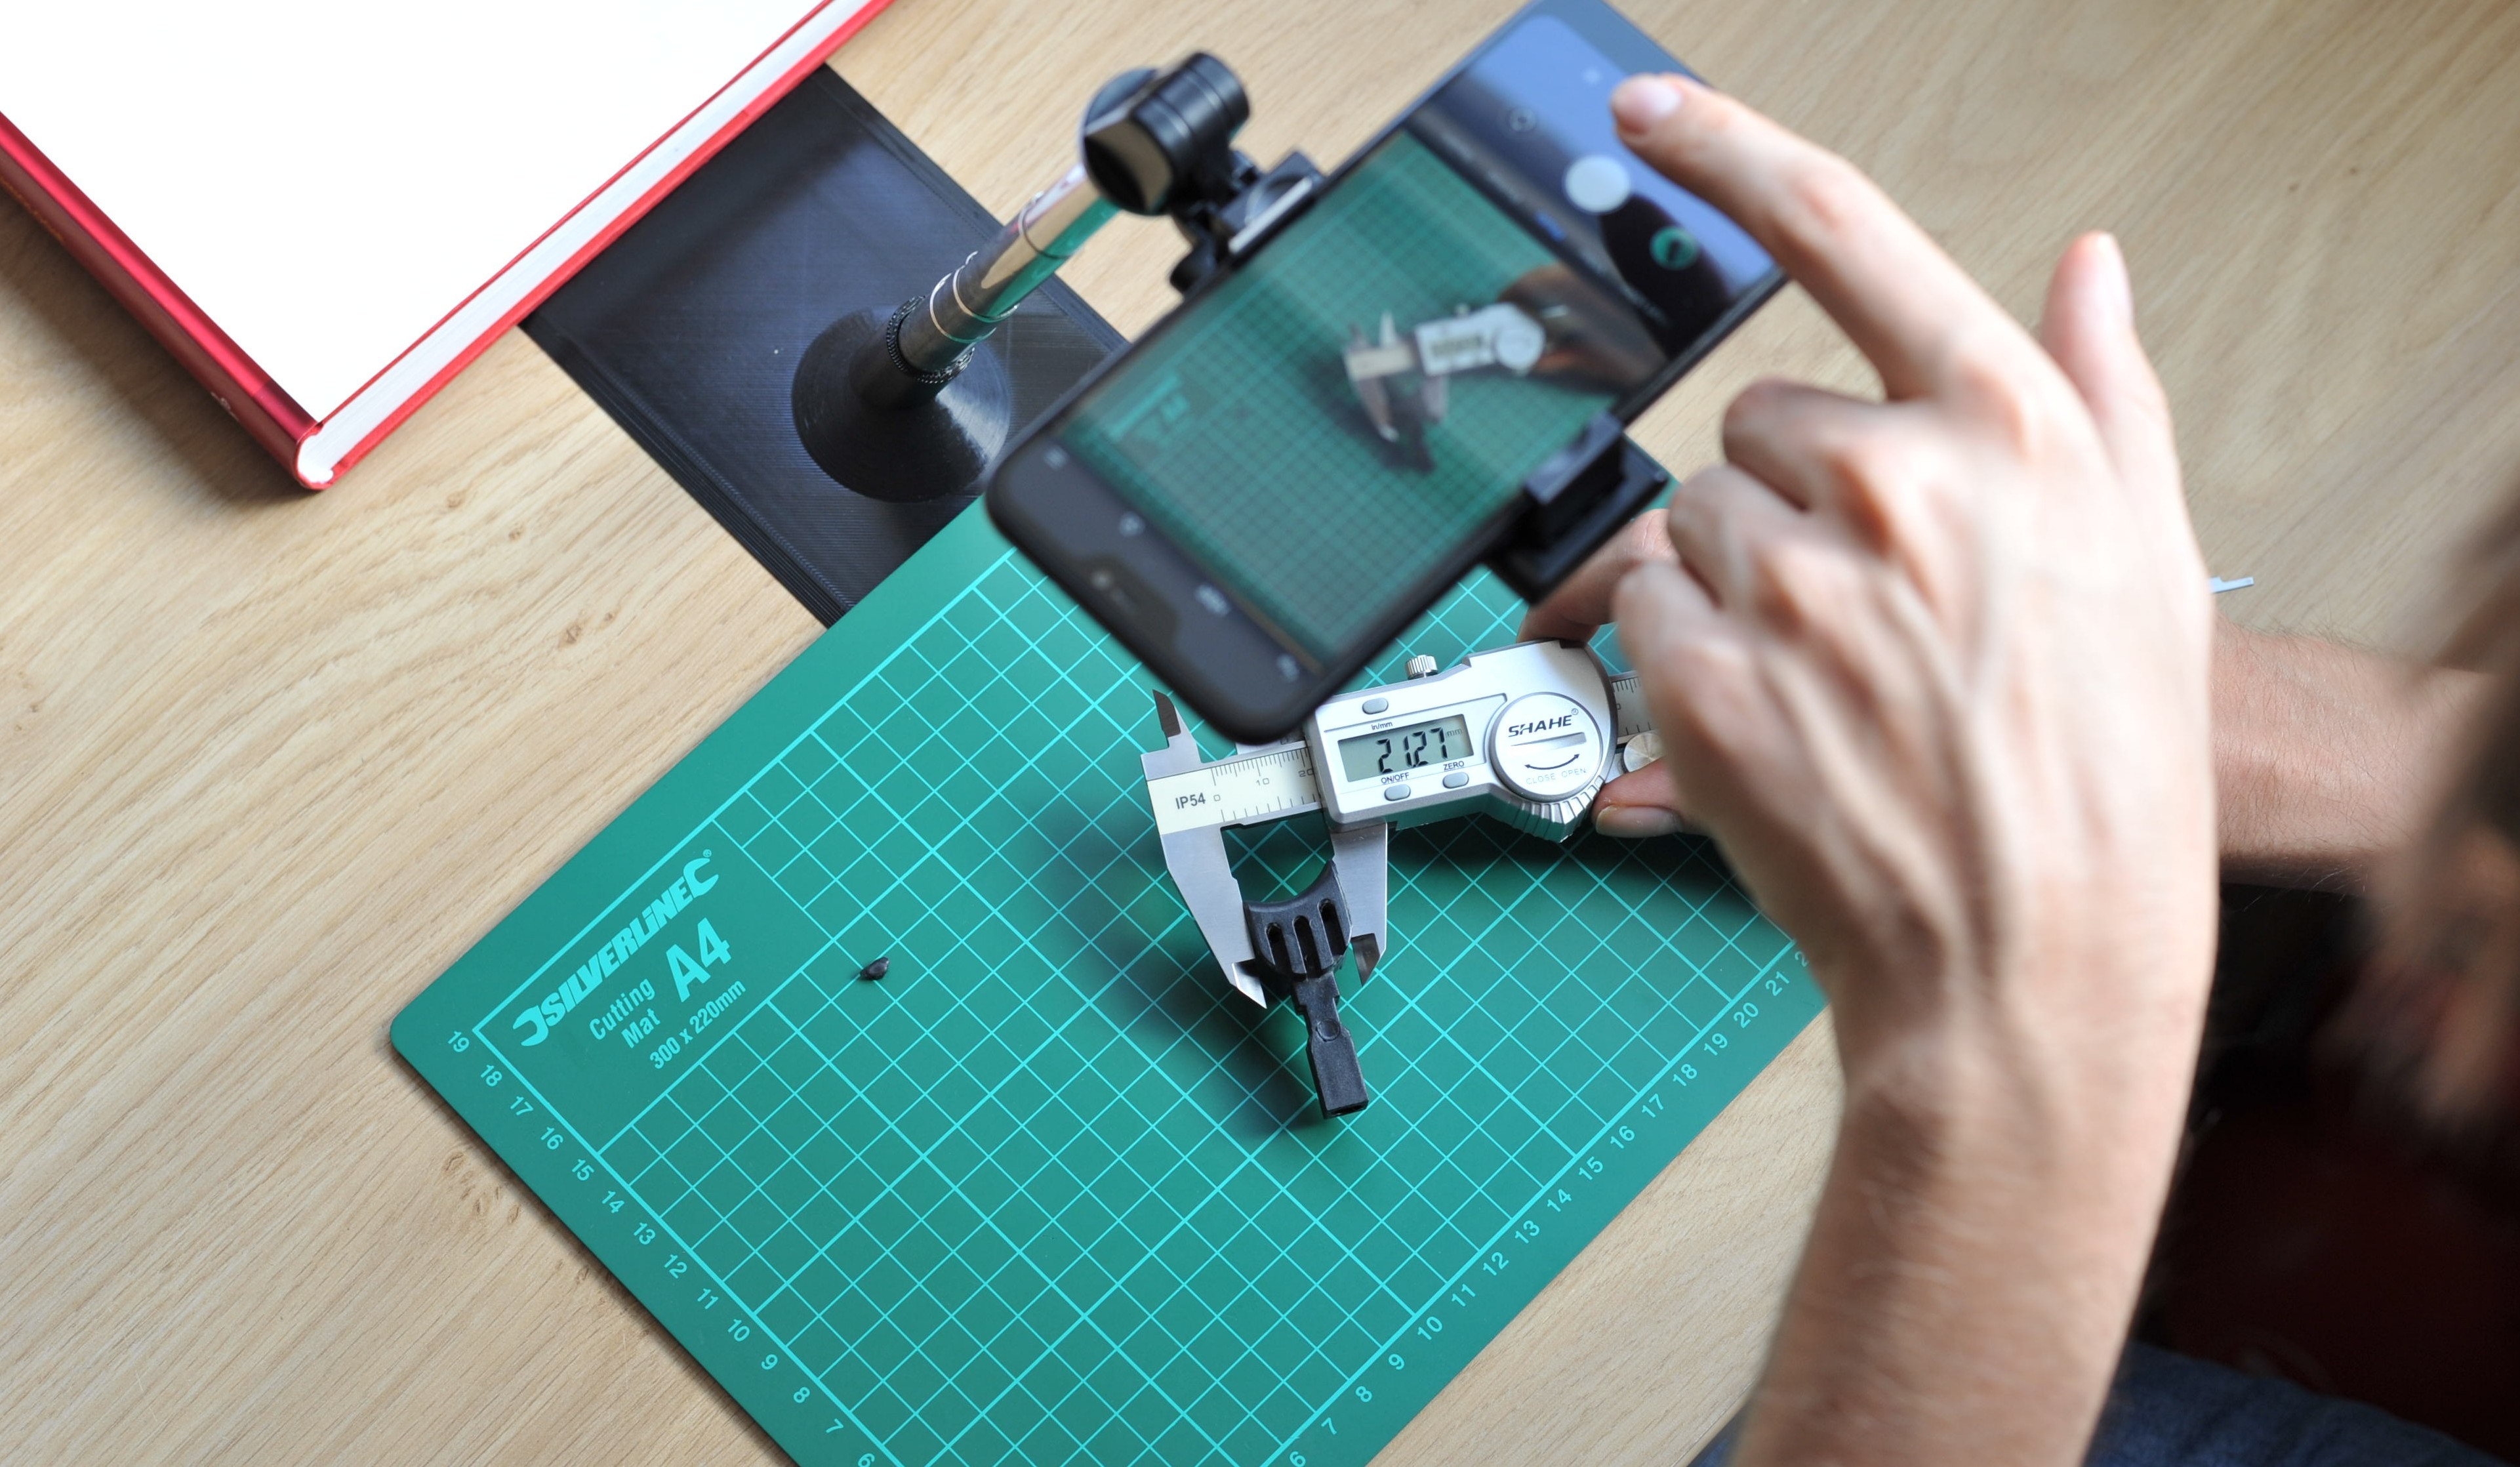
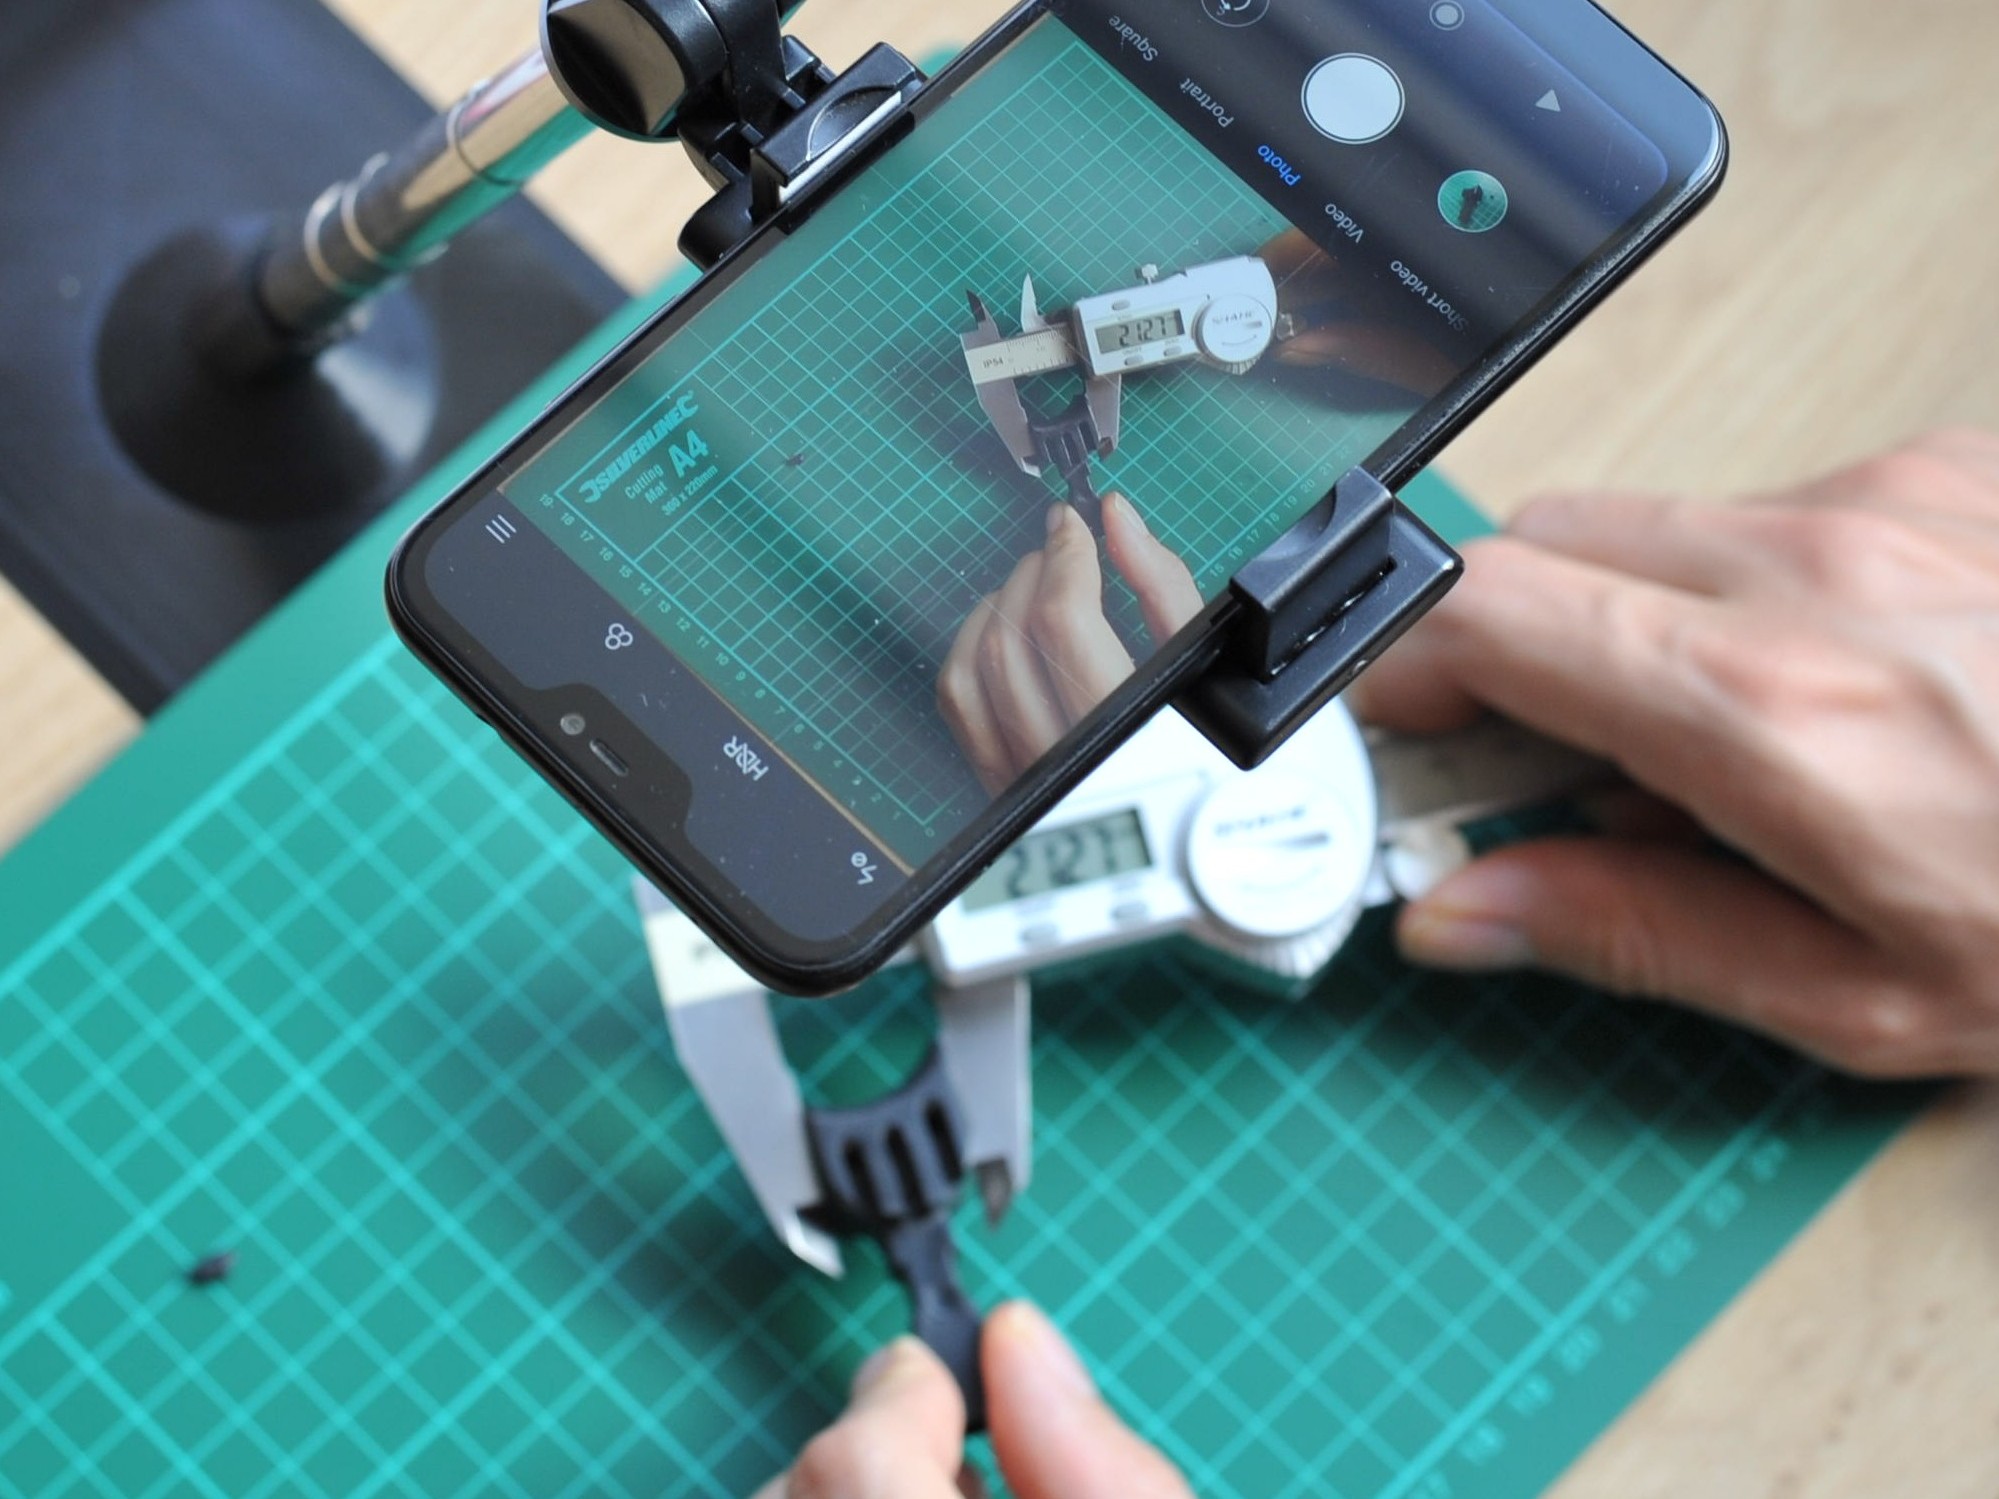
Step 4. Scan the part
Now put the phone in the standard if you have one.
Start taking pictures while measuring with the calipers, this can be tricky with one hand, make sure the measurements don't shift while taking the shot. Get help from someone if it doesn't work.
Make sure to keep the part in the center of the picture and that the screen of the caliper is readable.
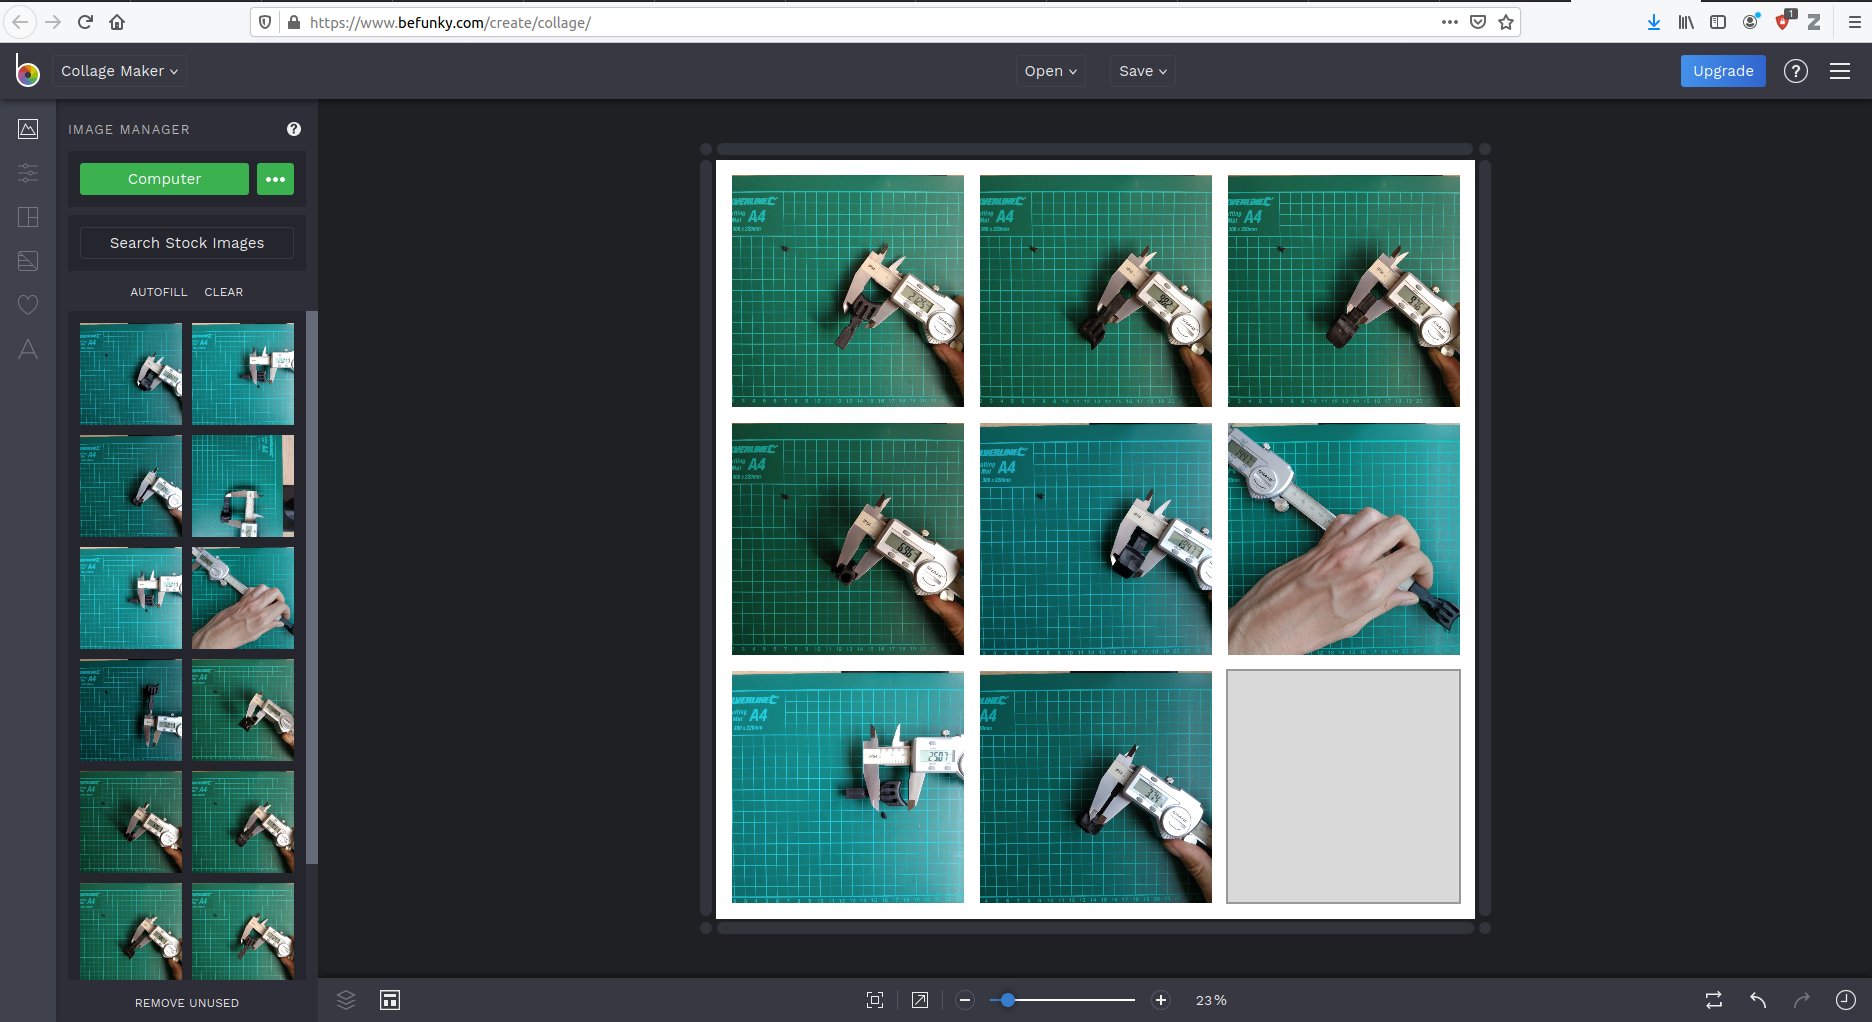
Step 5. Create a collage
Make a collage from your measurement photos.
You can do this at: Befunky website
Or use the mobile app: BeFunky app
Feel free to use another collage making software if you feel like it.
Make sure you don't forget photos, make two or max three collages if you have more than 9 photos. Its better to have double measurements than to leave one out.
Zoom in on small features to make them more clear, make sure all the measurements are readable.
Step 6. Describe your object
Add a detailed description of your part with relevant information such as:
- What the function of the part is.
- What kind equipment or product it belongs to.
- What kind of stresses are on the part under normal use?
- What kind of temperatures does it resist?
- Point to features in the pictures if necessary.
- Are there any features or adjustments you want that are not seen in the pictures?
- Are there any features that have broken off and got lost?
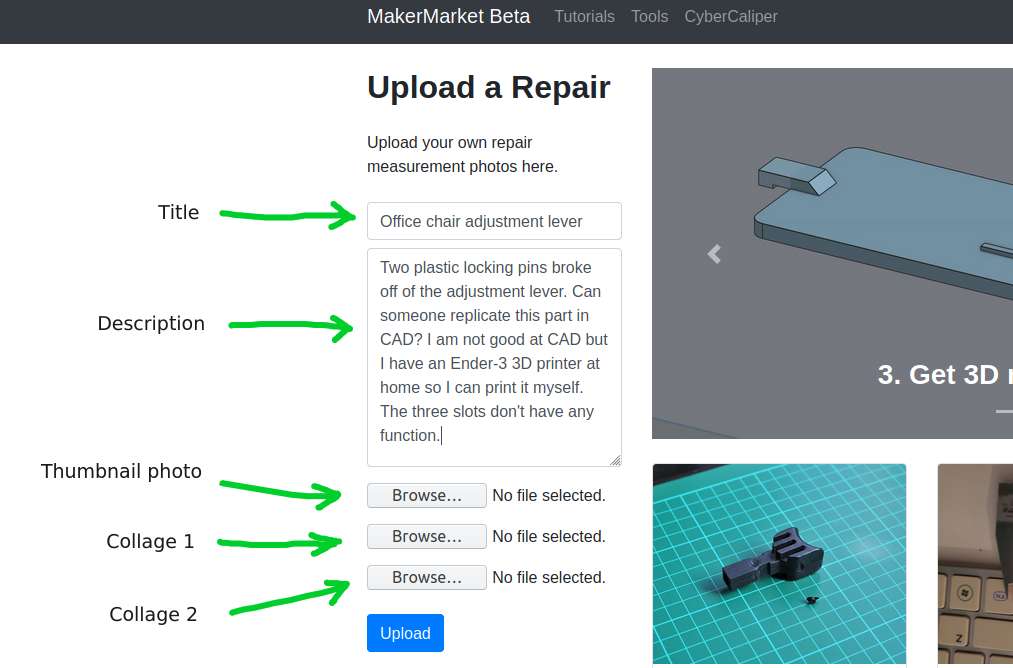
Step 7. Upload
Upload a title, description and collages to the MakerMarket!
Step 8. Communicate with makers
Makers will respond to your post with questions at first. Make sure you answer them precisely in order to get a correct 3D model.